
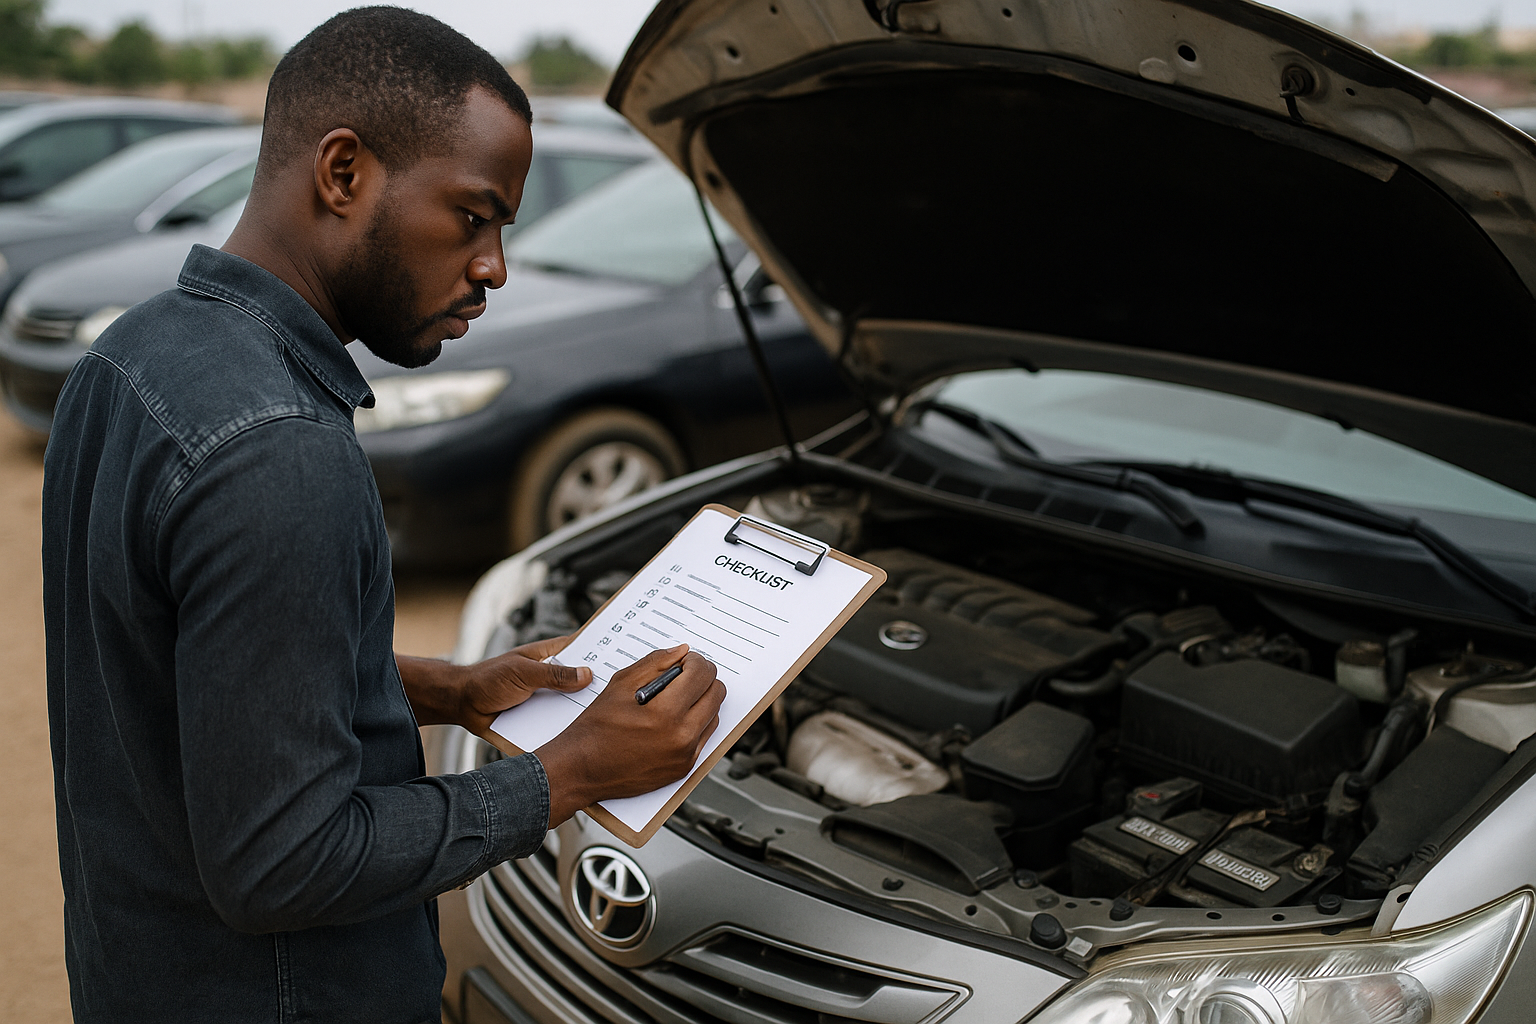
You’ve done the research, browsed the listings, and found a car that looks perfect online. Now comes the most critical 30 minutes of your entire car-buying journey. Before you let your heart make the final decision, it’s time to let your head—and a detailed checklist—take over.
The inspection is your single greatest protection against buying a vehicle with hidden issues, and it’s a step you must never, ever skip.
Many sellers, both private and dealer, hope you’ll be dazzled by a shiny exterior and a clean interior. But as an informed buyer, you need to know where to look for the tell-tale signs of past accidents, flood damage, or looming mechanical failures. This professional-grade Tokunbo car inspection checklist is your secret weapon.
It will guide you step-by-step through the same process our experts use, empowering you to identify red flags and make a truly confident purchasing decision.
This guide is a deep dive into the inspection process. For a complete overview of the entire buying journey, read our The Ultimate Guide to Buying Tokunbo Cars in Abuja.
Be Prepared: Your Essential Inspection Toolkit
Showing up prepared signals to the seller that you are a serious and knowledgeable buyer. Before you leave the house, gather these simple but essential tools:
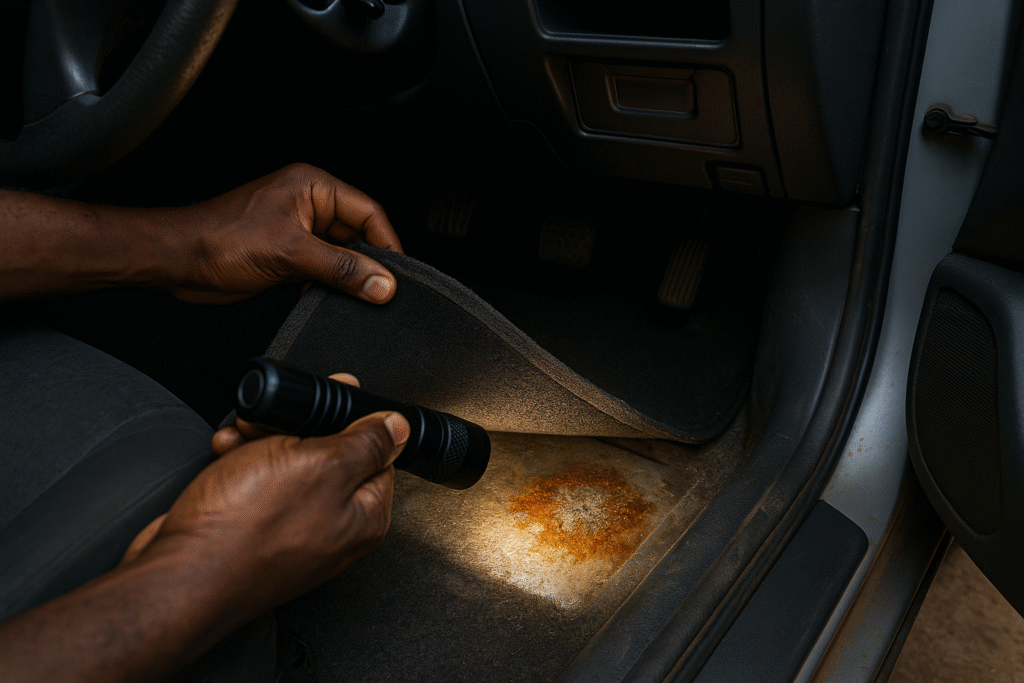
- A Powerful Torchlight: Your phone’s light is not bright enough. You need a dedicated torch to properly inspect dark areas like the undercarriage, wheel wells, and deep within the engine bay.
- Clean Rags or Paper Towels: You will need these to wipe the engine oil and transmission fluid dipsticks.
- A Small Magnet: A simple refrigerator magnet is perfect. This is your secret tool for detecting “bondo” (body filler), which is used to cover up repaired accident damage.
- A Notebook and Pen: To jot down any issues you find, from minor scratches to major concerns.
- A Friend or Family Member: A second pair of eyes is invaluable for spotting things you might miss and for your personal safety.
- OBD2 Scanner (Optional) : For those with some technical inclination or access to such a device, a basic OBD2 scanner can retrieve stored error codes from the car’s computer.
The 10-Minute Exterior Check: Uncovering the Car’s Past
Start by giving the car a slow, methodical walk-around in bright, open daylight. Never inspect a car at night or in the rain, as water can hide a multitude of paint defects.
- Check the Body Panels & Gaps: Look at the lines and gaps between the doors, bonnet, fenders, and boot. On a car with no accident history, these gaps should be tight and perfectly even all the way around.
- How to Check It: Run your finger along the gaps. They should feel consistent.
- Red Flag: Wide or uneven gaps are a major sign that a panel has been replaced or poorly repaired after an accident.
- Inspect the Paint & Finish: Kneel down and look along the side of the car from front to back at an angle.
- How to Check It: A factory paint job will have a perfectly smooth, mirror-like reflection. Look for any waviness, ripples, or a texture like an orange peel. Also, check the rubber seals around the windows and lights for any paint “overspray.”
- Red Flag: Any texture or overspray is a clear indication that that section has been repainted, likely to cover up damage.
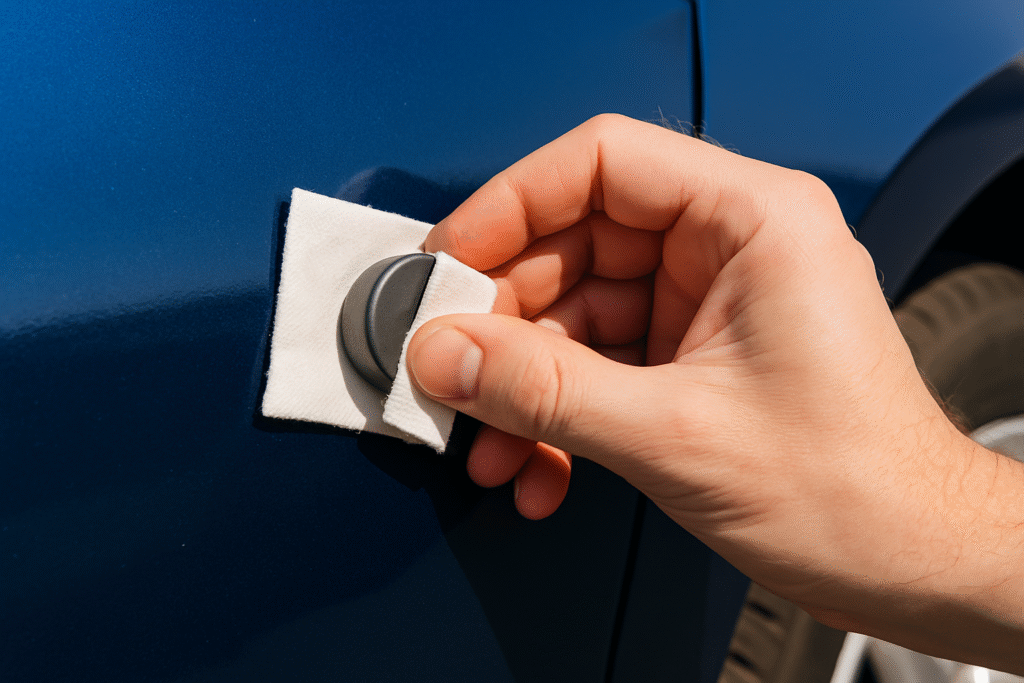
- The Magnet Test for Hidden Repairs: This is where your magnet comes in handy. Wrap the small magnet in a thin cloth or paper towel to prevent scratching the paint.
- How to Check It: Gently place the magnet on various parts of the car’s body—doors, fenders, quarter panels. It should stick firmly.
- Red Flag: If you find a spot where the magnet doesn’t stick or feels very weak, it’s highly likely that the area is full of plastic body filler (“bondo”), which is used to cover up significant dents or damage.
- Look for Rust: Rust is a cancer for cars, especially those from snowy or coastal regions.
- How to Check It: Use your torchlight to thoroughly inspect the bottom edges of the doors, inside the wheel wells, along the chassis frame underneath the car, and in the boot (under the carpet).
- Red Flag: Surface rust can sometimes be treated, but bubbling paint or flaky, deep rust on the car’s frame is a serious structural issue.
- Check the Tyres: The tyres can tell you a lot about the car’s maintenance.
- How to Check It: Look for the four-digit manufacturing date code on the tyre sidewall (e.g., “3523” means the 35th week of 2023). Any tyre older than six years should be replaced immediately, regardless of its appearance. Check the tread for uneven wear, which could indicate alignment problems.
- Red Flag: Expired, mismatched, or unevenly worn tyres indicate neglect and will be an immediate, costly replacement for you.
- Examine the Glass: Look for any cracks or large chips in the windscreen, as these can be expensive to replace and may compromise the vehicle’s structural integrity.
The 10-Minute Interior Check: Uncovering Wear and Flood Damage
Now, open the door and let your senses guide you.
- The Smell Test: This is your first and most important test for flood damage.
- How to Check It: Close the doors and windows for a minute, then take a deep breath.
- Red Flag: A strong, persistent musty, damp, or mildew smell is an almost certain sign of water damage. An overwhelming amount of air freshener or disinfectant is often used to try and mask this smell. Be suspicious.
- Check Under the Carpets:
- How to Check It: Lift the floor mats and, if possible, peel back a corner of the carpet in the footwells and in the boot.
- Red Flag: Any signs of dampness, silt, or caked-on mud are evidence of flooding.
- Inspect the Seat Bolts and Dashboard Screws:
- How to Check It: Use your torch to look at the metal bolts that hold the front seats to the floor of the car.
- Red Flag: These bolts should be clean. If they are rusted, it’s a classic indicator that water has pooled inside the car.
- The Electronics Gauntlet: Methodically test every single button, switch, and function.
- How to Check It: Power on the car (without starting the engine). Test the power windows (all of them), door locks, radio, horn, interior lights, and especially the Air Conditioning. Turn the AC to its coldest setting and the fan to maximum. It should start blowing ice-cold air within a minute or two.
- Red Flag: Any non-functioning electronic component could be a simple fix or a sign of a deeper electrical problem, often linked to flood damage. A common excuse that “the AC just needs gas” often hides a much more expensive compressor or condenser failure.
- Assess Wear & Tear vs. Mileage: Does the condition of the interior match the mileage shown on the odometer?
- How to Check It: Look at the wear on the steering wheel, gear selector, driver’s seat, and pedals.
- Red Flag: A car showing only 80,000 km but with a shiny, worn-smooth steering wheel and a collapsed driver’s seat is a strong indication that the odometer may have been tampered with.
If you feel overwhelmed by these checks, it’s always wise to get a professional opinion. Learn more about Using Pre-Purchase Inspection Services in Abuja.
Under the Bonnet: The 10-Minute Engine Health Check
You don’t need to be a mechanic to spot major red flags in the engine bay. Always perform these checks when the engine is cold.
- Engine Oil Check: Pull out the dipstick, wipe it clean, re-insert it fully, and pull it out again. The oil should be between the ‘MIN’ and ‘MAX’ marks.
- Red Flag: If the oil is black and gritty, it’s long overdue for a change. If it looks milky or like coffee with cream, walk away immediately. This indicates a catastrophic head gasket failure where coolant is mixing with the oil.
- Transmission Fluid Check: For automatic cars, check the transmission fluid dipstick (often a different color). The fluid should be reddish-pink and smell clean.
- Red Flag: If the fluid is dark brown or black and has a burnt smell, it’s a sign of severe transmission wear and a potential five-figure repair bill looming.
- Look for Leaks: Use your torchlight to look for any signs of fresh, wet oil or other fluid leaks on the engine block or on the ground underneath.
- Inspect Belts and Hoses: Look at the rubber belts and hoses. They should be firm and black.
- Red Flag: Belts with visible cracks, fraying, or a glazed appearance are old and will need to be replaced soon.
Table: Quick Guide to Fluid Leak Colors
| Fluid Color | Possible Source / Meaning | Severity Indication | Why It Matters |
| Black/Dark Brown | Engine Oil (old/leak) | Check Urgently | Common; can be minor (e.g., old gasket) or major. Oil loss leads to engine seizure, very costly. |
| Reddish/Pink/Brown | Automatic Transmission Fluid / Power Steering Fluid | Check Urgently | Transmission leaks are serious; repairs are expensive. Power steering leaks affect control, especially on rough Nigerian roads. |
| Green/Yellow/Pink/Orange/Blue | Coolant/Antifreeze | Check Urgently | Overheating is a major issue in Nigerian heat. A coolant leak can quickly cause severe engine damage. |
| Clear/Watery | AC Condensation (normal) / Windshield Washer Fluid (often blue/green, soapy) | Usually Normal (AC) / Minor (Washer) | AC condensation is expected. Washer fluid leak is minor but should be fixed for visibility. |
| Milky/Cloudy Oil | Engine Oil + Coolant (e.g., Head Gasket Issue) | MAJOR RED FLAG – WALK AWAY! | Indicates severe internal engine damage. Repair is extremely expensive, often requiring engine rebuild or replacement. |
| Burnt Smell Fluid | Transmission Fluid (Overheating/Internal Damage) | MAJOR RED FLAG – LIKELY EXPENSIVE FIX! | Suggests serious transmission problems. Rebuilding or replacing a transmission is one of the costliest repairs. |
The Test Drive: How the Car Should Feel on a Nigerian Road
This is where you evaluate the car’s core mechanical components in action. Insist on a test drive of at least 15 minutes that includes a mix of smooth roads and some bumps.
- Starting Up: Does the engine start easily and settle into a smooth, quiet idle?
- Acceleration: As you pull away, is the acceleration smooth and responsive, or does the car hesitate or stumble?
- Transmission Shifts: Pay close attention to how the automatic transmission shifts gears. The shifts should be almost unnoticeable.
- Red Flag: Any harsh jerking, delayed shifting, or a feeling of the engine revving high without the car speeding up (“slipping”) indicates serious transmission problems.
- Braking: From a safe speed (around 50 km/h), apply the brakes firmly.
- Red Flag: The car should stop in a straight line. If it pulls to one side, or if you hear any grinding or squealing noises, the brake system needs immediate attention.
- Steering and Alignment: On a straight, level road, does the car travel straight, or do you have to constantly correct the steering wheel to keep it in its lane? If it pulls to one side, it has alignment issues.
- Suspension: Find a slightly rough patch of road or some speed bumps.
- Red Flag: Listen carefully for any loud clunking, rattling, or knocking sounds from the suspension. This indicates worn-out components like shocks, struts, or bushings, which can be expensive to replace.
The Final Check: Verifying the VIN
A car that passes the physical inspection is still not a safe buy until its identity is verified.
- How to Check It: Locate the VIN (a 17-digit code) on the car itself, typically on a metal plate on the dashboard visible through the windscreen, and on a sticker on the driver’s side doorjamb.
- The Golden Rule: This VIN must perfectly match the VIN on all the vehicle’s documents, especially the original customs clearance papers. Any discrepancy is a deal-breaker.
For more on this, see our guide on Understanding Nigerian Number Plates & Registration.
Key Takeaways
- An Inspection is Non-Negotiable. This is the single most important step to protect your investment. Never buy a car based on pictures or the seller’s word alone; a thorough physical inspection is essential to avoid costly surprises.
- Focus on the Big Three: Accident, Flood, and Engine. Check for uneven panel gaps and mismatched paint to spot accident damage. Use your sense of smell to detect musty odors that indicate flood damage. Finally, check the engine oil on the dipstick; if it appears milky, it’s a sign of major engine problems.
- The Test Drive Reveals the Truth. Pay close attention to how the transmission shifts, how the brakes feel, and listen for any clunking noises from the suspension when going over bumps. These are issues a car at rest cannot reveal.
- Verify the VIN on Both the Car and Paperwork. The Vehicle Identification Number (VIN) on the dashboard and doorjamb must perfectly match the VIN on all customs and registration documents. Any discrepancy is a major red flag that compromises the vehicle’s legal status.
- When in Doubt, Hire an Expert. If you are not confident in your mechanical knowledge, hiring a trusted, independent mechanic to conduct a professional pre-purchase inspection is the best money you can spend for true peace of mind.
Conclusion: Trust, but Always Verify
This checklist may seem exhaustive, but a thorough inspection is your right and your single most important responsibility as a buyer. By taking the time to follow these steps, you arm yourself with the knowledge to identify a great car and, more importantly, to walk away from a bad one.
Feeling overwhelmed? You don’t have to be a master mechanic to buy a great car. At Autokunbo.com, we do the work so you can buy with total confidence. Every vehicle in our inventory comes with a detailed, 150-point inspection report that you can view online. We handle the verification so you can focus on the excitement of your new car.